 United States / Global
 Europe
 Canada
 Australia / New Zealand
 Japan
Japan
 China
China
 Latin America
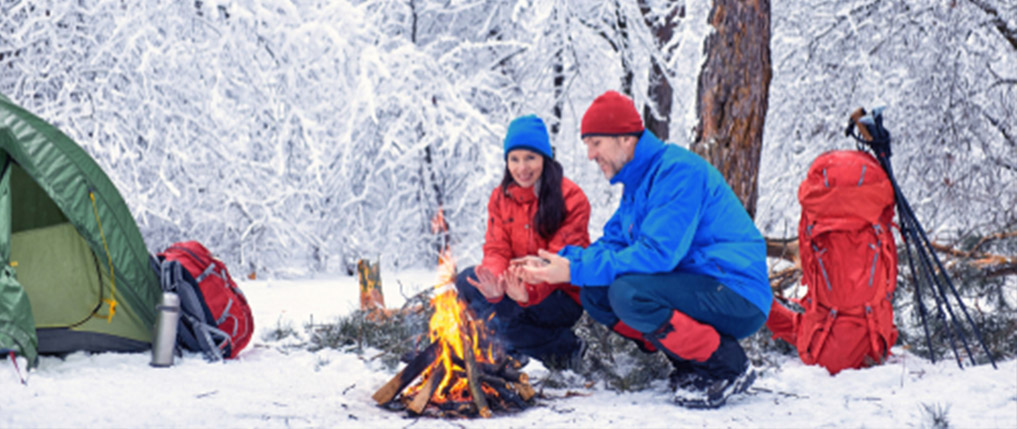
Camping Gear for Winter Camping
Make winter camping an enjoyable experience with the right camping gear. Otherwise, without the proper gear, you may find yourself ready to pack up and head back to a warm home. Here is a list of items and what features they need to make winter camping comfortable and warm.Rated Tent
You need a tent, of course, but choosing the right tent can protect you from the winter weather.- 3-Season Tent – While adequate for some winter camping, use this standard tent only if you are camping below the tree line and the forecast is clear and sunny, without much stormy weather.
- 4-Season Tent - If you plan on camping in heavy snow or high winds, a 4-season tent is a must-have! These tents are constructed with sturdier poles and thicker materials to combat fierce winds and heavy snowfalls. A 4-season tent is also designed to have less mesh that usually allows for air circulation, and an extended rainfly that reaches the ground and prevents snow flurries from coming inside.
Heavy-Duty Backpack
Winter camping requires a heavy-duty backpack to resist the elements and carry bulkier winter clothing and other such gear. In fact, you may need a larger backpack than you typically carry in summer. While you should always pack light, you still need to be prepared for colder conditions. As a rough estimate, an 80-liter size backpack should suffice for a two- to three-day winter camping trip. Of course, make sure the backpack has enough lash tabs and compartments to secure large and awkward gear like snowshoes.Cold Weather Sleeping Bag
When the temps drop even lower at night, a cold weather sleeping bag will keep you warm and cozy. Determine the lowest nightly temperatures you will experience and aim for a sleeping bag rated 10°F lower–the more, the better! For freezing 30°F temps, choose a 20°F-rated bag and so on. Never worry about being too hot. You can always open the bag up. When it comes to a cold weather sleeping bag interior, you have two options to keep you warm: goose down and synthetic materials. Down offers a fantastic warmth-to-weight ratio and can be compressed down. Sleeping bags with synthetic materials tend to be heavier and bulkier, which can be a disadvantage when backpacking. The one downside to down is that it can lose warmth should it get wet, so it's imperative to keep it from the elements. Draft tubes are another feature. Located behind zippers, draft tubes can keep heat from escaping. Draft collars and hoods, located above the shoulders, will offer extra warmth, too. Sleeping bag liners are a nice addition and offer many advantages. A good liner can add extra warmth and keep sweat and oils from the sleeping bag, which is more difficult to clean.Sleeping Pad
Sleeping pads do more than provide a pebble-free surface to sleep on. They also offer an extra insulating layer between you and the ground. When it comes to winter camping, here are the features to look for in a sleeping pad and some extra tips: Look for a pad with a high R-value. R-value is the measure of thermal resistance and can range from 1.0 to 8.0. The best winter camping pad should be designed for all-seasons (much like the four-season tent) and have a 4.0 minimum R-value to keep you well-insulated. Stack two sleeping pads for ultimate warmth. Place a closed-cell foam pad closest to the ground to block the cold and sleep inside the sleeping bag directly on a self-inflating pad.Backpacking Stove
It's critical to learn how to start a campfire so you can create warmth and a means of cooking. However, a fire is not entirely efficient at boiling water or cooking certain foods. For that, you need a backpacking stove. Choose one of two types of backpacking stoves: canister stoves and liquid fuel stoves. Here's the defining differences between the two: Canister stoves - These stoves are lightweight and quick to boil; however, they are not ideal for winter camping, especially in mountainous regions with higher altitudes and cold conditions. For canister stoves to work in cold conditions, they need a built-in pressure regulator to create a stronger flame. Liquid fuel stoves – For high altitudes and below-freezing temps, always use a white gas liquid fuel stove. The disadvantage to liquid fuel stoves is that they are heavier and slower to boil. Plus, you might have to prime them before you cook. Hybrid multi-fuel stoves – Similar to liquid fuel stoves, hybrid multi-fuel stoves have the advantage of burning on a variety of fuels, such as white gas, kerosene, unleaded gasoline, diesel and even jet fuel. If you plan to go international for your winter camping trip, a hybrid stove model is the way to go, offering versatility for various countries you may visit. Extra Stove Tips:When not using the stove, keep the fuel tucked away in a sleeping bag or inside a coat pocket. When you're ready to eat, it will allow greater fuel efficiency to cook your meals faster. Always bring two stoves! For emergency purposes, mainly, but also to cook piping hot food for group meals that much quicker. Bring extra fuel canisters, especially in winter. It takes longer to melt snow for drinking water. Plus, fuel runs less efficient in higher elevations. Make a plywood base to help stabilize the stove in melting snow. As you heat your food, surrounding snow will melt. For stoves that sit on a canister, wrap the base in aluminum foil to reflect heat to keep the canister warm.
Crampons, snowshoes, skis and snowboards
Hiking to your site in a light dusting of snow is not too challenging. However, for anything deeper (and if forecast anticipates more), you need to come equipped with proper traction and footing. Crampons – A great traction device with teeth-like grips for treading ice, crampons can easily attach to your hiking boots. If the path is slick, crampons can save you from a hard tumble. Snowshoes - Better suited for fluffier snow, snowshoes add a wider, more stable footprint to get you from point A to point B, instead of sinking with each step. Like crampons, you slip them over regular boots. Many shoes include advanced traction systems like crampon-like grips and a heel-lift bar. Snow skis - Cross-country skis are perfectly adequate for flatter terrains. For steeper slopes and mountainous areas, use backcountry skis. Snowboards – Snowboards are a nice alternative; however, choose a versatile splitboard style that can separate and act as snowshoes. If you have a standard snowboard, be sure to carry snowshoes for climbing hills.Sled
Reduce weight on your back during longer carry-ins and camping trips by getting yourself a sled. Sleds can also allow you to effortlessly haul additional gear. Just keep in mind you might break a sweat lugging it uphill, so determine a route with the flattest terrain possible.Avalanche Safety Equipment
Wherever you go wilderness camping, it's important to bring a first aid kit. But when you are winter camping near mountains, there may be the threat of an avalanche. If in mountainous regions, identify and avoid avalanche terrain and check the forecast. Regardless, it's imperative to carry this extra equipment:- Avalanche Transceiver – Should an avalanche occur and you become buried, this transceiver will send an alert signal to nearby transceivers.
- Avalanche Probe Pole – Using side depth markings, these collapsible poles measure a snow's depth up to 10 feet, and help to find victims.
- Snow Shovel – Dig out avalanche victims with a snow shovel. You can also dig into the snow to build a shelter to melt drinking water.
Best Clothes for Winter Camping
Just as important as your gear and equipment is your clothing. Warm materials and layering is key. Here is what to wear when winter camping:Base Layer
When winter camping, you need a long and snug underwear-style base layer. Choose quick-drying, moisture-wicking fabrics like polyester and wool. And be sure to select the appropriate base layer thickness for your excursion.- Lightweight – Mild, slightly warmer temperatures
- Midweight – Colder temperatures
- Heavyweight – Below freezing temperatures